
Programming the FPGA-384 board using an ESP32.
After power is applied to the FPGA, it requires programming, otherwise it will wait in an idle state.
This can be done in one of two ways, either by the FPGA automatically reading a program from a serial EEPROM, or being programmed via SPI from the ESP32, which requires that the ESP32 has the program already stored, and is the method used in all the example programs.
Getting started
Using the Arduino IDE, which can be downloaded here, open the Blink project.
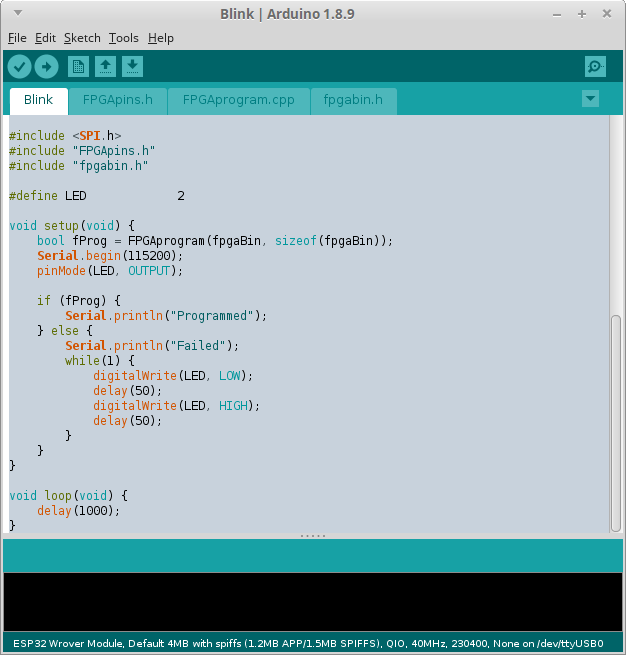
Note that in the IDE there are 4 tabs present.
- The sketch file - which programs the FPGA using the function FPGAprogram()
- FPGAprogram.cpp - which has the code for the FPGA_program.
- FPGApins.h - which defines the pin connections.
- FPGAbin.h - which contains the FPGA program data.
Pin Connections
The wiring should match the definitions in FPGApins.h
See the Pinout and Wiring page for more details.
Check your wiring, power on the board, and upload your code. If all went well, the LED's should be blinking!
Any project can now be uploaded to check operation of the FPGA.
Changing the FPGA program
Modifying the fpga's program, e.g. to change how fast the LED flashes, can be done by changing the blink.v verilog source file using your favourite text editor:
It is assumed that the IceStorm tool chain & FPGA-384 software have already been installed.
Installing the tools and compiling the verilog code requires the use of a terminal.
Once installed, in the fpga directory, simply type:
This will generate a header file, which contains the FPGA program, that is used in the Arduino IDE project
Not requiring the Arduino IDE
Arduino-mk allows the use of a Makefile for ESP32 projects. It is not required, but it makes the development cycle much faster, as it is easy to switch from editing verilog source code, to transferring this to the ESP32 and programming the FPGA.